阿豪运维笔记
搭建git服务器
1、安装服务
[root@localhost~]# yum install git
2、添加git用户,并且设置shell为/usr/bin/git-shell,目的是为了不让git用户远程登陆
[root@localhost~]# useradd -s /usr/bin/git-shell git
3、进入到用户的家目录下
[root@localhost~]# cd /home/git
4、创建authorized_keys文件,并更改属主、属组和权限,用来存客户端机器上的公钥
[root@localhost git]# mkdir .ssh
[root@localhost git]# touch .ssh/authorized_keys
[root@localhost git]# chown -R git.git .ssh
[root@localhost git]# chmod 600 .ssh/authorized_keys
5、复制下客户端的公钥到服务段上,测试下是否可以登入,出现这样表示没问题
[root@localhost git]# ssh -p51022 git@192.168.80.99
Last login: Sat Jun 16 22:39:14 2018 from 192.168.80.99
fatal: Interactive git shell is not enabled.
hint: ~/git-shell-commands should exist and have read and execute access.
Connection to 192.168.80.99 closed.
6、定好存储git仓库的目录
[root@localhost git]# mkdir /data/gitroot
[root@localhost git]# cd /data/gitroot
创建一个裸仓库,裸仓库没有工作区,因为服务器上的Git仓库纯粹是为了共享,所以不让用户直接登录到服务器上去改工作区,并且服务器上的Git仓库通常都以.git结尾
[root@localhost gitroot]# git init --bare sample.git
Initialized empty Git repository in /data/gitroot/sample.git/
7、设置权限
[root@localhost gitroot]# chown -R git.git sample.git
8、在客户端上(自己pc)克隆远程仓库
[root@o20171 gitroot]# git clone git@ip:/data/gitroot/sample.git
此时就可以在当前目录下生成一个sample的目录,这个就是我们克隆的远程仓库了。进入到这里面,可以开发一些代码,然后push到远程。
安装gitlab
1、介绍与要求
gitlab官网 https://about.gitlab.com/gitlab-com/
官方安装文档 https://about.gitlab.com/installation/?version=ce#centos-7 (ce/ee)
要求服务器内存不少于2g
2、安装方法
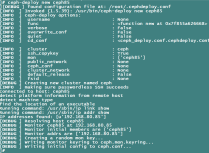
[root@localhost ~]# vi /etc/yum.repos.d/gitlab.repo   //加入如下内容
[gitlab-ce]
name=Gitlab CE Repository
baseurl=https://mirrors.tuna.tsinghua.edu.cn/gitlab-ce/yum/el$releasever/
gpgcheck=0
enabled=1
2.1、安装
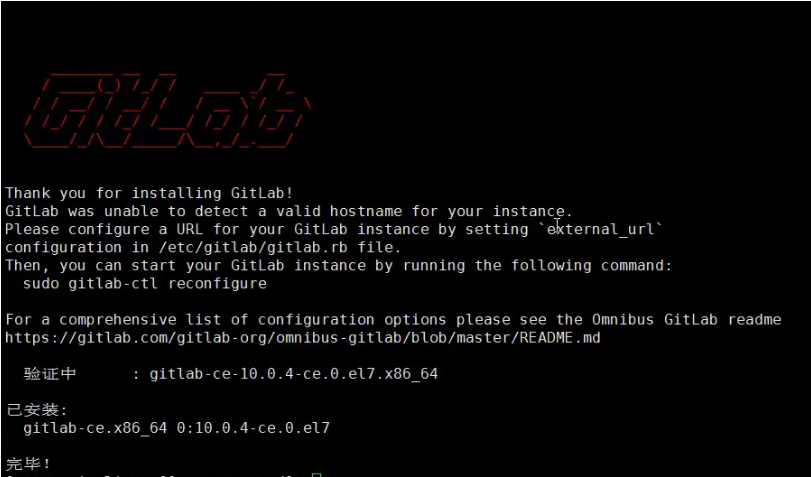
[root@localhost ~]# yum install -y gitlab-ce
2.2、载入配置服务(初始化和修改/etc/gitlab/gitlab.rb 后需要重新载入)
[root@localhost ~]# gitlab-ctl reconfigure
查看监听的端口

重启操作命令:gitlab-ctl stop/restart/start/status
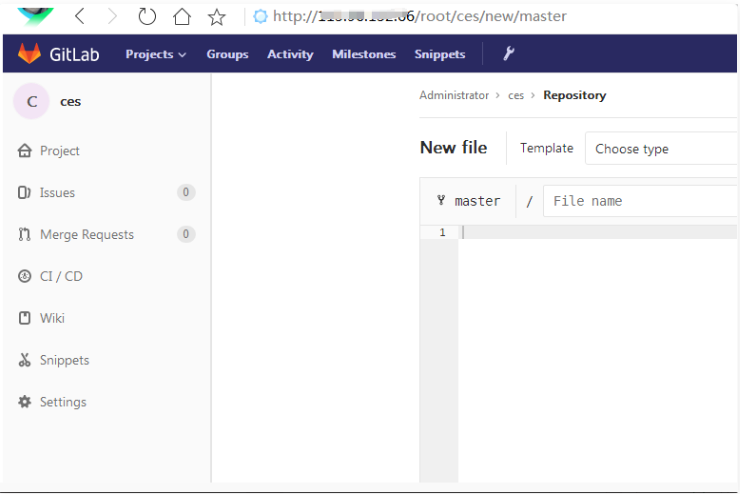
浏览器访问gitlab,输入ip即可
默认管理员root,无密码,它会让我们去定义一个密码
gitlab
1、启动服务
sudo gitlab-ctl start
2、停止服务
sudo gitlab-ctl stop
3、重启服务
sudo gitlab-ctl restart
4、检查服务的日志信息
4.1、检查redis的日志
sudo gitlab-ctl tail redis
4.2、检查postgresql的日志
sudo gitlab-ctl tail postgresql
4.3、检查gitlab-workhorse的日志
sudo gitlab-ctl tail gitlab-workhorse
4.4、检查logrotate的日志
sudo gitlab-ctl tail logrotate
4.5、检查nginx的日志
sudo gitlab-ctl tail nginx
4.6、检查sidekiq的日志
sudo gitlab-ctl tail sidekiq
4.7、检查unicorn的日志
sudo gitlab-ctl tail unicorn
4.8、检查服务状态
sudo gitlab-ctl status
站点配置文件
[root@localhost ~]# vi /var/opt/gitlab/nginx/conf/gitlab-http.conf
gitlab备份和恢复
[root@localhost ~]# gitlab-rake gitlab:backup:create
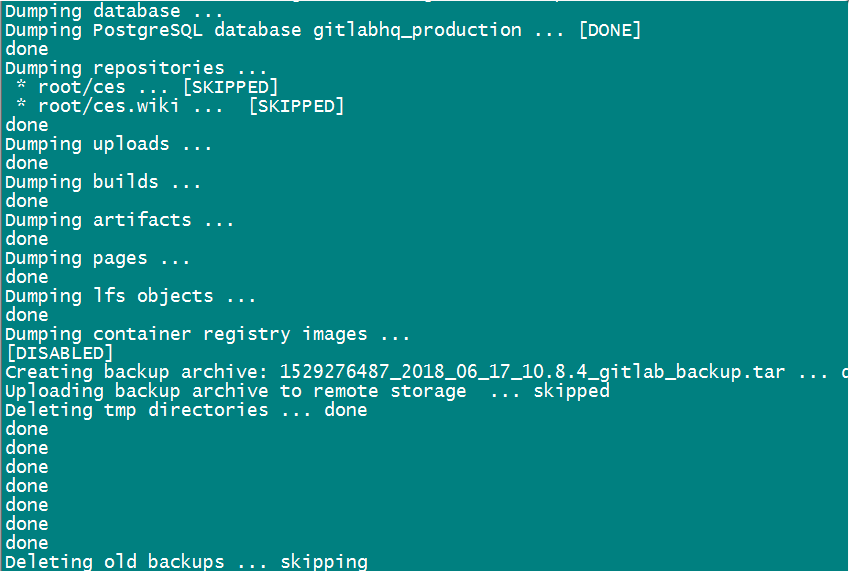
备份目录在/var/opt/gitlab/backups

[root@localhost ~]# gitlab-ctl stop unicorn ; gitlab-ctl stop sidekiq
ok: down: unicorn: 0s, normally up
ok: down: sidekiq: 1s, normally up
[root@localhost ~]# gitlab-rake gitlab:backup:restore BACKUP=1529276487_2018_06_17_10.8.4(这里是一个编号,即备份文件的前缀)
再启动服务 gitlab-ctl start
扩展
svn的钩子 http://coolnull.com/1716.html
gitlab修改端口 http://blog.csdn.net/arybd/article/details/54635295
修改主机名 http://www.mamicode.com/info-detail-1316828.html
第三方邮件 http://blog.csdn.net/liuruiqun/article/details/50000213
server ssh 端口并不是22 http://www.cnblogs.com/limx/p/5709101.html http://www.linuxidc.com/Linux/2017-02/141043.htm
应该修改 /opt/gitlab/embedded/service/gitlab-rails/config/gitlab.yml
# If you use non-standard ssh port you need to specify it
ssh_port: xxxxx
gitlab的钩子相关配置 http://fighter.blog.51cto.com/1318618/1670667